
> COLONIAL FERRY 1
> COLONIAL FERRY 2 > CRAB SCRAPING BOAT > EMMA C. BERRY > ALMA > HANNAH > LARK > CLERMONT >NANTUCKET > FLATTIE > FLATTIE > ROUND STERN > BOATSHOP DIORAMA > POWER SKIFF > DRAKETAIL > HEAD BOAT > MINI ROUND STERN > MESSENGER > STERN CUTAWAY > SHALLOP > DELAWARE > SAILING SKIFF > ROWBOATS > WRIGHT SKIFF > F.D.CROCKETT > PRINCESSKITS FOR NOVICES TOOLS TECHNIQUES MUSEUMS LINKS ABOUT ME
In the event that you looked at my "About Me" page, you may have noticed that I work as a guide at a couple of historic sites in Virginia. One is Ferry Farm, where George Washington spent his boyhood years. The foundation that owns the Farm, along with some other historic groups in the area, wants to create a replica of a colonial ferry (also known as a "flat"), such as might have been used to cross the Rappahannock River at Ferry Farm in the middle 1700s. A committee has been formed to study the feasibility.
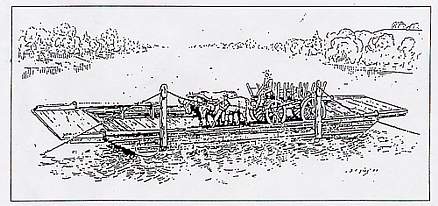
18th-century ferry drawing by Sidney King, artist and historian
Very little is known about colonial ferries. Some years ago, the remains of one was discovered in the Trent River in North Carolina and archaeological study of that ferry has given a few clues about their construction. Many questions remain unanswered, however. In an attempt to learn more about the construction of these ferries and to have something tangible for the ferry committee members to see, I was asked to build a model of a ferry. The model shown here is at a scale of 1:24 (1/2-inch = 1 foot). Including the ramps, the model is about 20 inches (508 mm) long and 6-1/4 inches (159 mm) wide.
Since building this first ferry some years ago, I have built a second ferry model that is similar, but different.
Since there are no plans and we have only general dimensions and a few contemporary drawings, this was treated as a study model. Once the full-size replica is built, I expect to build an accurate model of the replica for display. As an example of the study aspect, I've left one side of the bulwarks unplanked. There is no information to tell us whether an original ferry of this type would have had the inside of the bulwarks planked. Exposed timberheads might be likely to catch objects as they were being loaded and unloaded and planked sides would eliminate this possibility. Still, it might not have been a problem, so planking would simply have been an unnecessary addition of time and money to building the ferry.
Another example is the hinging method used to attach the ramps to the ends of the ferry. I've conjectured iron strap hinges but that might not be correct. There is some evidence to suggest the ramps may have been held on by simply running ropes through holes in the ramps and the ferry itself. Again, this will be decided during construction of the replica.
The pictures below show the model during construction as well as the finished product. I used poplar for construction - one of my favorite woods for ship modeling. The original doubtless would have been made from pine, which is abundant in Virginia. It would not likely have been painted - paint was just too expensive for such a small, working vessel. More likely, the ferry would have been black with cow and horse dung and mud as a result of doing its daily work!
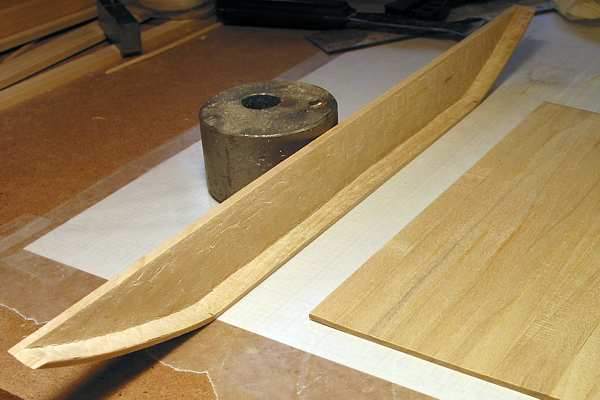 Carved side |
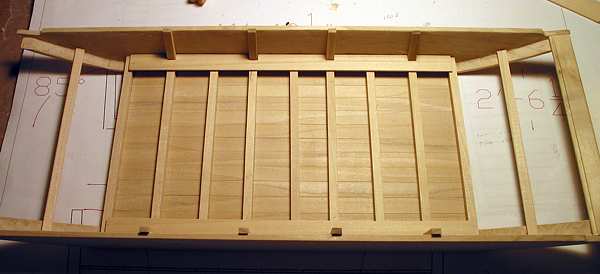 Ready for inside planking |
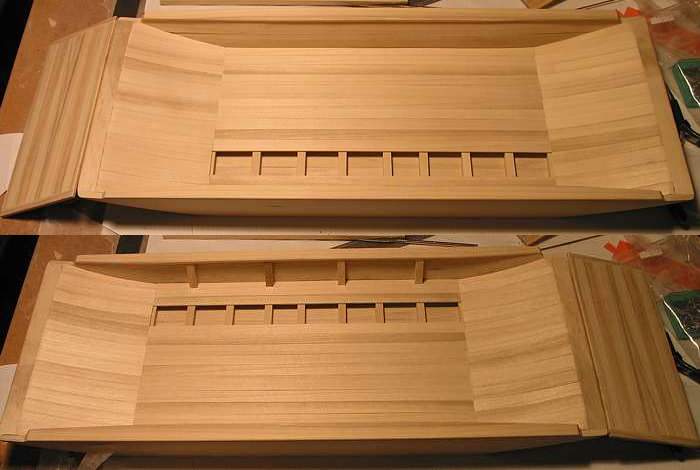
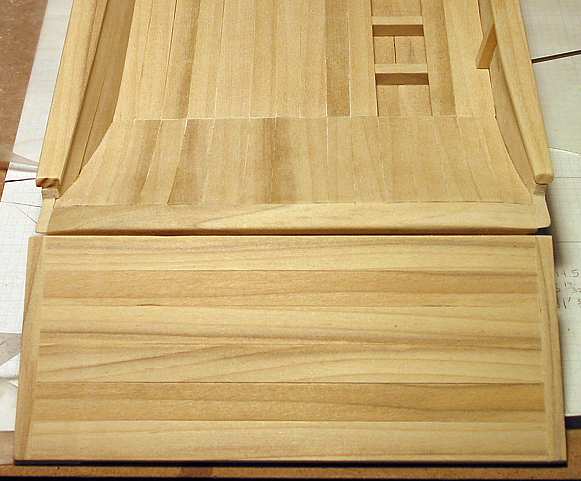
Each side of the original ferry was carved from a single log. The sides are nearly 3 feet high and about 30 feet long. Quite a prodigious timber! The bottom is planked longitudinally. Four hewn knees support each side and cross timbers, called rungs, support the planking. |
|
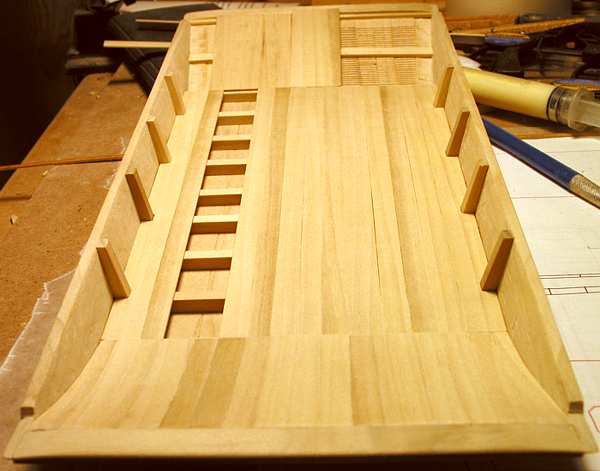 Inside planking |
 Inside planking |
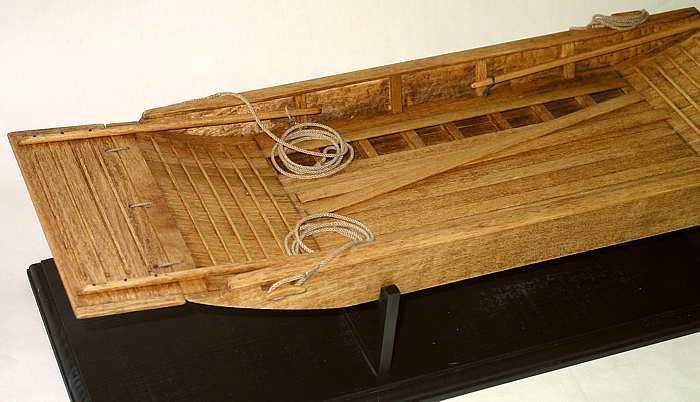
One can see, from the pictures above, just how simply this boat was constructed. As mentioned earlier, I planked the bulwark on one side and left the other side with exposed knees. Two planks are removed from the bottom to show construction of the framing. These planks simply lie in the bottom of the completed model as if they'd been removed for inspection of the cross timbers below. I'd like the committee members to see a bit of the construction. |
|
 Ramp construction |
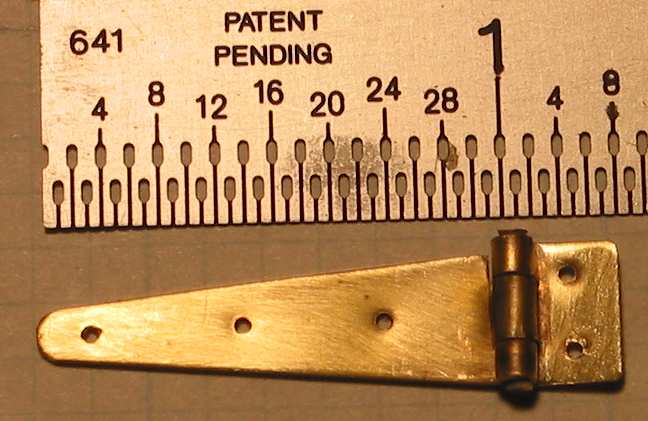 Strap hinge |
The ramp was constructed with breadboard type edging. I cut tenons on the ends of the boards that fit into a slot on the edging. Shown above is one of the strap hinges I made. Three of these are used on one ramp I call the "iron" end. The other ramp is held on with ropes and I call it the "rope" end. I've shown the stand and baseboard here because that was the result of a lot of thought. I didn't want the baseboard to detract from the model nor did I want the model and baseboard to blend together. The boat is so flat, it's a bit hard to display. I finally decided to build trestles since they would look light and I painted the whole thing black so it would not blend in with the model as it would have if I'd just stained the baseboard. I'm pleased with the results. |
|
 Hinges on ramp |
 Stand and baseboard |
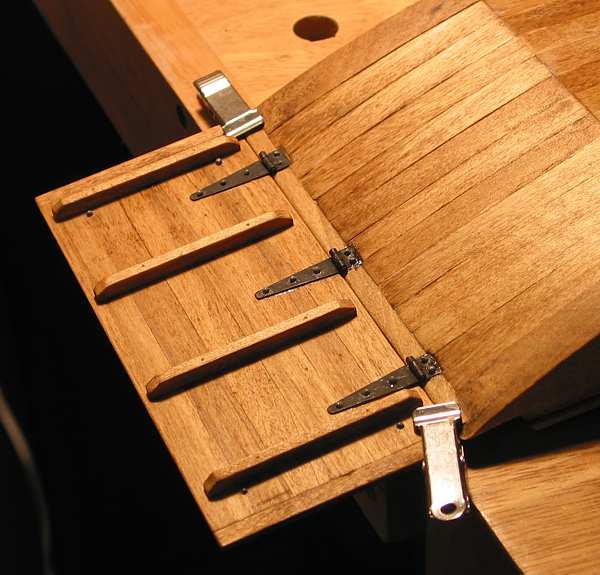
The series of four pictures below shows the ramps, levers, and hold-downs. On the iron end, the ramp levers are held on with iron straps and bolts. You can also see the bolt heads for the hinges. Note - I didn't use real bolts. In actual practice, the smith would have used an iron rod with a peened head on one end. The rod would have been inserted thru the ramp and hinge, then the other end peened over (cold) with a hammer. Clench nails were commonly used on hinges as well but, given the daily stresses and strains the ramps would have taken, I felt bolts were more appropriate. The simulated bolts were simply blackened lill pins and the heads made with a two-part material called J B Weld. This product has a long set-up time (about 4 hours) and as it dries, it becomes like a putty. It can be shaped fairly easily in this stage. After it's fully dried (about 15 hours) it is like steel and can be sanded or filed as needed. My placement of the bolts was a mistake, however. When I made the hinges, I had not applied the wooden cleats to the top of the ramps. (The cleats would give the animals something to catch their hoofs against when they were climbing up the ramps and sloped part of the bottom.) I glued the hinges on the ramp after the cleats were in place. When I drilled the holes for the bolts, I discovered, to my dismay, that I'd drilled right thru some of the cleats. Removing the offending cleats might have caused a fair amount of damage that would have been hard to repair with the hinges already epoxied onto the ramp and boat. So I just left them as they were with some of the bolt heads on top of the cleats. Not one of my finer moments! But I won't make that mistake again. The other ramp is held on by just threading rope through some holes in the ramp and ferry. | |
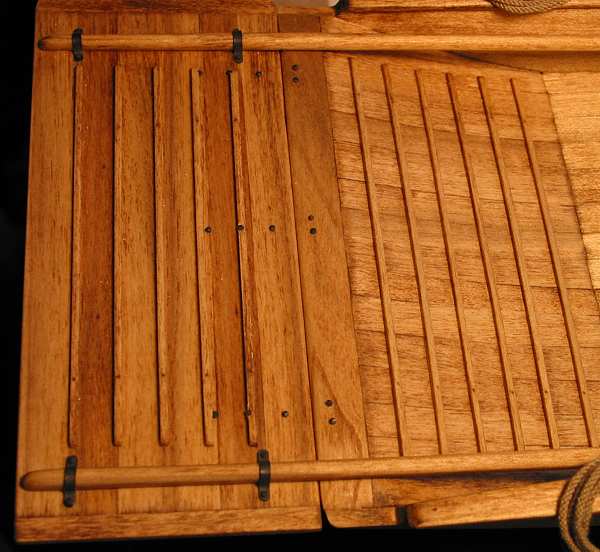 The "iron" end |
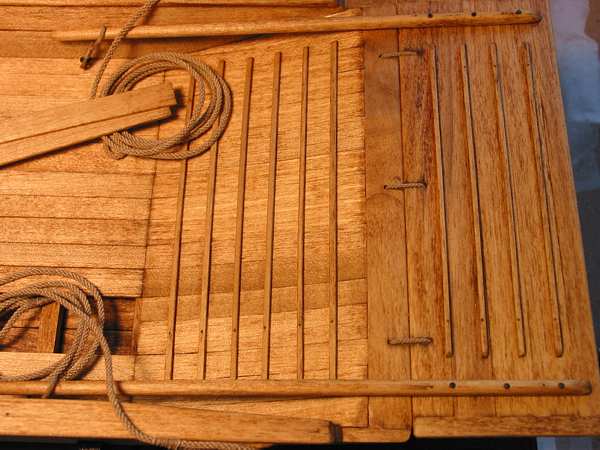 The "rope" end |
Note in the two pictures below, the two different hold-downs for the ramp levers. The levers are used to raise and lower the ramps when docking to account for differences in levels between the water and the shore. While under way, the levers would have been held down with some sort of mechanism so the ramps wouldn't be in the water. On the "iron" side I fashioned simple iron hooks (from blackened brass, of course) to hold down the levers. On the "rope" side, I made up rope slings. I made thimbles for the rope slings where they attach to the eye bolt since I figure they'd get a fair amount of wear and tear. | |
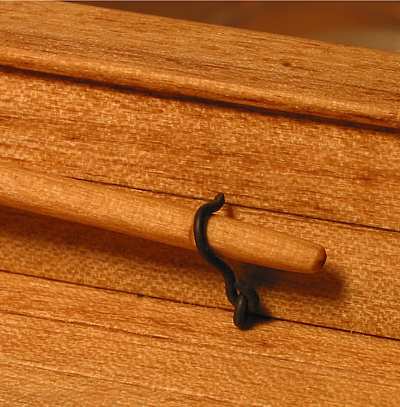 Iron hold-down |
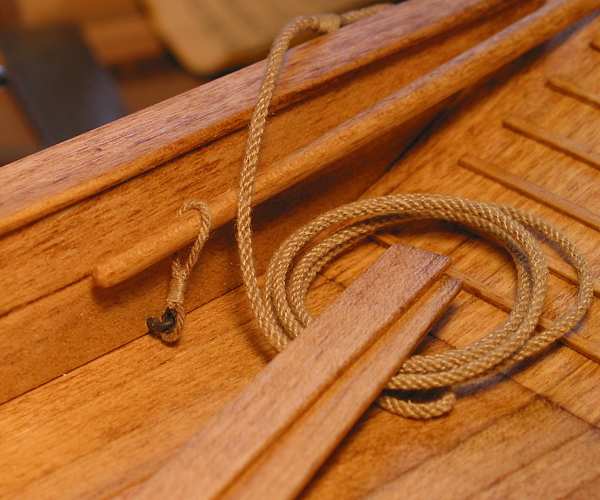 Rope hold-down |
The ferry was completed on December 2, 2004. In all, it took about 80 hours to build. Also seen in these pictures are the two different approaches to the cleats. On the "iron" end, I arbitrarily put them on the rail. On the "rope" end, I put them on the sides. I think the sides are more likely (and there is an old drawing of a ferry that shows them this way) but I wanted to show both ideas. You may also notice that the ramp levers are longer on the iron end than on the rope end. In fact, the iron-end ramp is longer than the rope-end ramp (5 feet vs. 4 feet). The sketches we have show a fairly short ramp but it seems almost too short. In keeping with the two-ended theme of the model, I made two different length ramps as a study aid. | |
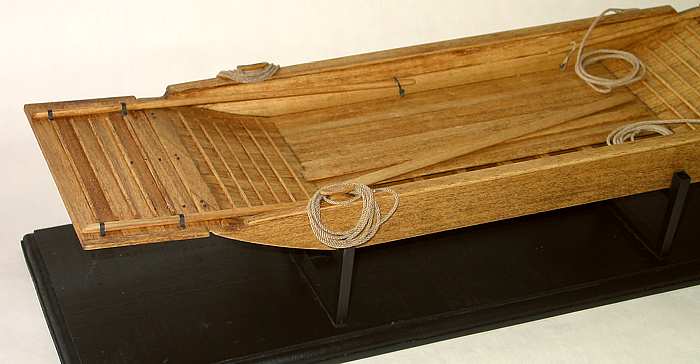 Completed ferry |
 Completed ferry |
This was a fun project! Not particularly difficult (a good thing since it's only my second scratch-built model) but, because of the lack of plans, somewhat challenging nonetheless. There's no question in my mind that scratch building provides me with the greatest amount of satisfaction in this hobby. Sometimes, I think the "scratch" part has to do with all the head scratching that takes place while you figure out how to do something! Great fun though. | |
Copyright © 2021 - John H. Earl
All Rights Reserved.
Problems with the site? Contact the Web Master
Last Updated:
April 3, 2021